Zhan Zhuang Video Course
Zhan Zhuang Video Course
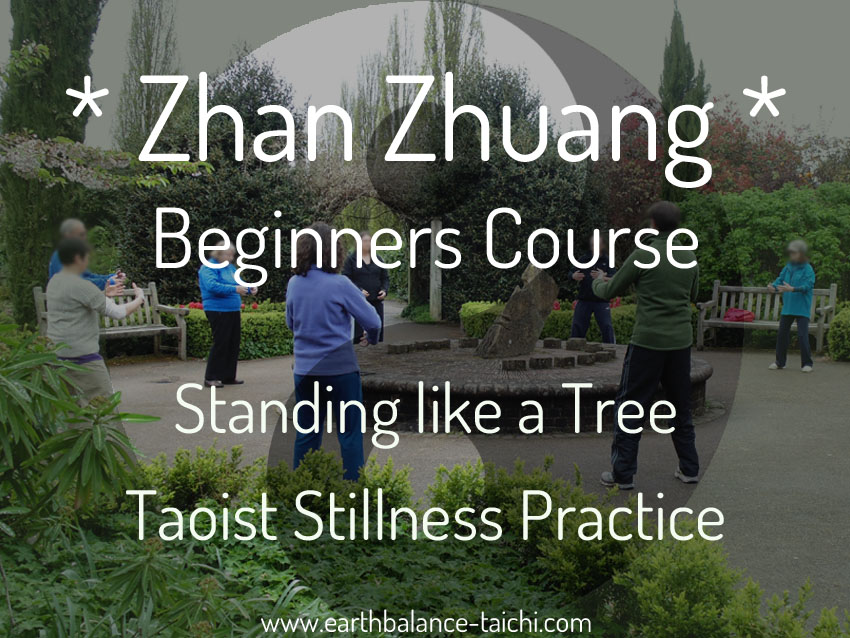
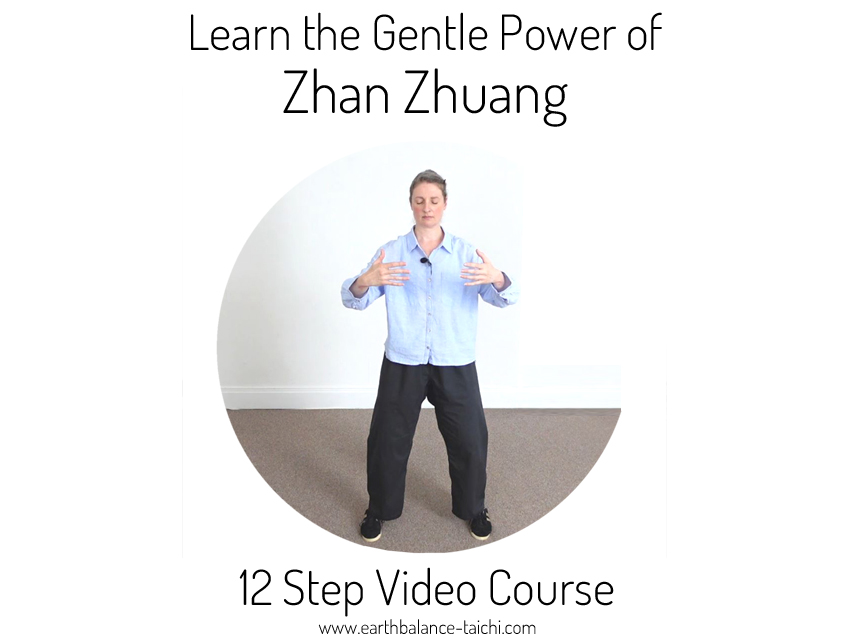
A free programme for beginner students. Zhan Zhuang / Standing like a Tree / Standing Pole is a stillness meditation which is a unique and powerful method to awaken the body in stillness. It is an ancient internal Taoist practice to cultivate mind and body. Learn to re-wire your habitual posture, integrate strength, ground the mind, open the tissues in the body, loosen the joints, release physical tension, and develop body sensitivity. This Zhan Zhuang video course takes you through foundation knowledge of body alignment and posture, the three main principles of body mechanics: peng jin, fang song and rooting, and finishing up with controlled breath work. The videos guide you from 2 minutes to 24 minutes of standing. You can view the whole course in HD on YouTube.
How to use the Zhan Zhuang Video Course Series
Take note this is not a 12 day programme. To have the best experience as a beginner Zhan Zhuang student, practice one of the lessons every day with the same single point of focus e.g. knees. Be guided by my verbal instruction and continue focusing on the lesson theme for the duration of the video. Keep practising the same video each day, and when the alignment or principle becomes familiar and relaxed, and when your body does not resist or move into a tense state, move onto the next lesson.
Zhan Zhuang Video Course - Caveat
Please note that this Zhan Zhuang video course is not a replacement for in person tuition. Zhan Zhuang should ideally be taught hands on, where posture and alignment corrections are given and shown physically.
Zhan Zhuang Video Course - Preparation
Always warm up to loosen the joints before you stand. Take each joint through a gentle rolling motion from the hands down to the feet.
Zhan Zhuang Video Course
Lesson 1 - The Feet - 2 Minutes
- Stand in Wuji posture.
- Find level ground where the feet are at the same height.
- Place the feet as wide as the hips or shoulders.
- Find a horizontal heel alignment.
- The index toes point forwards.
- Your body weight is equal, 50% on each leg.
- The tail bone is in the middle of your feet.
- This ensures you are balanced from the ground upwards.
- Find the three balls of the feet, two at the front and the one at the back is the heel. This helps straighten the ankles.
- Either equal weight between the balls of the feet or slightly more weight on the heels.
- Let your bodyweight sink into your feet, and feel it gently push back up the legs and body.
- Standing in this way stimulates the bubbling well point in the centre of the foot, which is the first point on the kidney meridian.
- Bring your mind’s eye down to the feet.
- Feel the feet connecting to the ground.
- Feel the pressure transferring through the feet to the ground.
- Balance that pressure, too little will uproot you, and too much will cause tension.
- Root down into the earth.
- Soften all the joints.
- Relax your breathing.
- Close with 3 heavenly breaths.
Lesson 2 - The Knees - 4 Minutes
- Stand in Wuji posture.
- Align the feet.
Position the knees as wide as the feet. - Align the knees in the centre of the foot, both front and back.
- Avoid pushing the knees passed the toes.
- Make sure your knees are aligned in the direction of your toes, not rolling inwards or outwards.
- Slightly bend the knees.
- Imagine a sphere is between the knees.
- Relax the knee caps as you apply a gentle lifting quality to them.
- The longer you stand the more these areas will want to revert to your habitual posture.
- Take care not to hold the knees in tension to maintain the structure.
- Be aware of sensations as you stand and let feelings come and go.
- Soften all the joints.
- Relax your breathing.
- Close with 3 heavenly breaths.
Lesson 3 - The Hips - 6 Minutes
- Stand in Wuji posture.
- Align the feet.
- Align the knees.
- Sink back and down into a squat using the hip crease, like sitting on a stool or onto a stability ball.
- The tail bone sits behind the heels.
- Bring the pelvis into neutral, not pushed forwards or backwards to one extreme or the other. Find balance.
- Loosen the hip joints and relax any holding in the hip/groin area.
- Spread the back of the pelvis left to right, take care that this doesn’t alter the knee position.
- Lift up the pelvic floor gently, sealing the Hui Yin point.
- This alignment helps the muscles work together appropriately including aligning the psoas muscle so that it can contract appropriately and stabilise the lower back, spine and hips.
- The longer you stand the more these areas will want to revert to your habitual posture.
- Take care not to hold these parts of the body in tension to maintain your structure.
- Be aware of sensations as you stand and let feelings come and go.
- As you tire, relax more into the structure to aid deeper release.
- Breathe slower and deeper to help move through body fatigue.
- Soften all the joints.
- Relax your breathing.
- Close with 3 heavenly breaths.
Lesson 4 - The Lower Back, Abdomen & Waist - 8 Minutes
- Stand in Wuji posture.
- Align the feet.
- Align the knees.
- Align the hips.
- Fill the lower back by bringing dantian (navel) towards ming men (opposite navel).
- This adds to the pelvis discussion, where we avoid over arching the S curve in our lower backs.
- Filling the lower back means to lengthen the lumbar area, to reduce the excess curve.
- Relax and lengthen the tail bone down without force or tension, releasing the lumbar muscles and opening the lower back.
- This opens the ming men point between the kidneys, between lumbar 2 and 3, and is known as the gate of life.
- This is an important concept in Traditional Chinese Medicine, as an open ming men is associated with a zest for life and strong vitality. It is also the strongest point in the body relating to our overall strength.
- This alignment helps create a stabilised spine and helps to align the internal organs correctly.
- Relax the abdomen and side waist.
- Take care when aligning the pelvis and lower back that these do not influence how you hold the abdomen.
- Avoid contracting the abdominal muscles to help maintain your structure.
- The longer you stand the more these areas will want to revert to your habitual posture.
- Avoid holding the body in tension.
- Become aware of sensations as you stand and let feelings come and go.
- As you tire, relax more into the structure to aid deeper release.
- Breathe slower and deeper to help move through body fatigue.
- Soften all the joints.
- Relax your breathing.
- Close with 3 heavenly breaths.
Lesson 5 - The Spine - 10 Minutes
- Stand in Wuji posture.
- Align the feet.
- Align the knees.
- Align the hips.
- Align the lower back, waist and abdomen.
- Upright the spine.
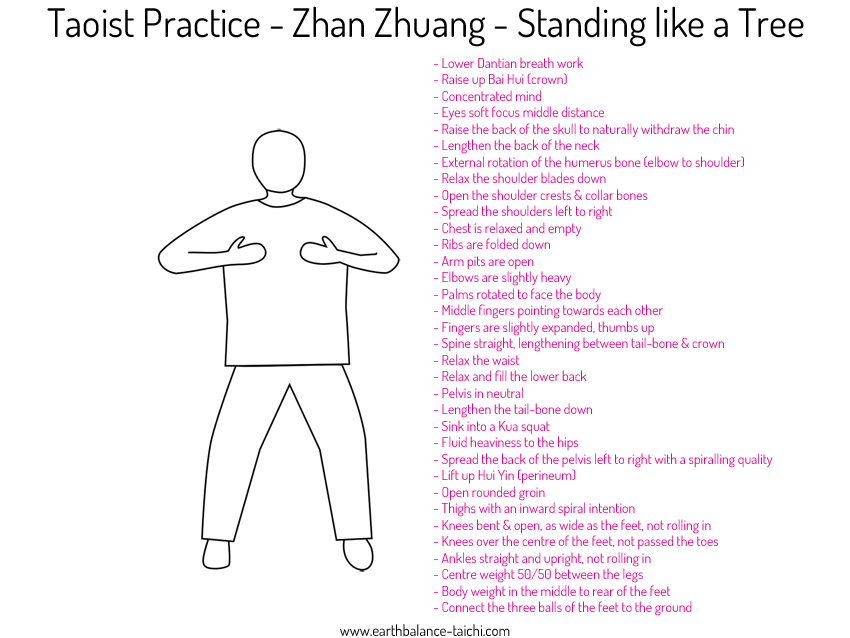
- Imagine there is a ‘plumb line’ that connects the top of your crown, the Bai Hui and the perineum, the Hui Yin, this line should be vertical, not tilting to one side, collapsing to the front or swaying back with a lean.
- The spine is symmetrical.
- This creates a straight line through the body known as the Tai Chi pole.
- Lengthen between the tail bone and crown.
- Find a heavy quality in the hips, countered by equal opposing pressure, that expands the spine up through the crown.
- This creates an elastic rebounding strength.
- It stretches the spine, creating space and release between the vertebra.
- Find a gentle pressure to avoid moving into tension.
- The rear of the spine is yang – lengthening from the tail bone to the crown.
- The front of the body is yin – empty and relaxed.
- The longer you stand the more the spine and back will want to revert to your habitual posture.
- Take care not to hold your spine in tension to maintain the structure.
- Be aware of sensations as you stand and let feelings come and go.
As you tire, relax more into the structure to aid deeper release. - Breathe slower and deeper to help move through body fatigue.
Soften all the joints. - Relax your breathing.
- Close with 3 heavenly breaths.
Lesson 6 - The Shoulders & Chest - 12 Minutes
- Stand like a tree posture.
- Align the feet.
- Align the knees.
- Align the hips.
- Align the lower back, waist and abdomen.
- Align the spine.
- Raise the arms up to the chest into an embracing sphere shape.
- Relax the trap muscles on the top of the shoulders down.
- Bring the shoulder crests into neutral not hunched forwards and not extended too far back.
- Place gentle melting weight in the shoulder blades to relax them down, so that they are not tensed or raised up.
- Fold the ribs in, avoid flaring them upwards and out.
- Seek a vertical line with the base of the sternum bone.
- Avoid slouching the chest and shoulders.
- Exhale to the end of the breath, this is the chest position needed, it’s slightly hollow with the vertebra between the shoulder blades opened. This is an empty chest.
- The longer you stand the more the shoulders, chest and ribs will want to revert to your habitual posture.
- Take care not to hold these parts of the body in tension to maintain the structure.
- Become aware of sensations as you stand and let feelings come and go.
- As you tire, relax more into the structure to aid deeper release.
- Breathe slower and deeper to help move through body fatigue.
- Soften all the joints.
- Relax your breathing.
- Close with 3 heavenly breaths.
Lesson 7 - The Arms & Hands - 14 Minutes
- Stand like a tree posture.
- Align the feet.
- Align the knees.
- Align the hips.
- Align the lower back, waist and abdomen.
- Align the spine.
- Align the shoulders and chest.
- Form a soft bend in the elbows and wrists, curving the arms in an arc shape.
- Heavy the elbows, positioning them pointing down and out.
- Imagine resting the wrists and elbows on water with an external buoyant quality that supports.
- The palms are rotated to face the body.
- The hands are slightly curved.
- The hands are the counter balance to sinking weight into a squat.
- Fingers are slightly separated and expanded like they are inflated.
- Thumbs point upwards creating the tiger’s mouth palm posture.
- Find a relaxed embracing quality with the arms and hands, a gentle inward squeeze.
- This a gentle quality to avoid moving into tension.
- Be aware of sensations as you stand and let feelings come and go.
- As you tire, relax more into the structure to aid deeper release.
- Breathe slower and deeper to help move through body fatigue.
- Moving the joints gently can also help longevity.
- Soften all the joints.
- Relax your breathing.
- Close with 3 heavenly breaths.
Lesson 8 - The Head - 16 Minutes
- Stand like a tree posture.
- Align the feet.
- Align the knees.
- Align the hips.
- Align the lower back, waist and abdomen.
- Align the spine.
- Align the shoulders and chest.
- Align the arms and hands.
- Gently lift the back of the skull up, the occiput which is the bulb at the base of the head.
- This will naturally raise up your Bai Hui, the crown point.
- It will also lengthen the vertebra in the back of the neck.
- The motion of raising the occiput will drop and withdraw the chin naturally.
- Avoid forcing the chin to withdraw towards the spine as this will create too much tension.
- Keep the front and back of the neck soft.
- Soften the mouth, jaw and throat.
- The longer you stand the more the head and neck will want to revert to your habitual posture.
- Take care not to hold the head in tension to maintain the structure.
- Become aware of sensations as you stand and let feelings come and go.
- As you tire, relax more into the structure to aid deeper release.
- Breathe slower and deeper to help move through body fatigue.
- Moving the joints gently can also help longevity.
- Soften all the joints.
- Relax your breathing.
- Close with 3 heavenly breaths.
Lesson 9 - Principle Peng Jin - 18 Minutes
- Stand like a tree posture.
- Align the feet.
- Align the knees.
- Align the hips.
- Align the lower back, waist and abdomen.
- Align the spine.
- Align the shoulders and chest.
- Align the arms and hands.
- Align the head.
- Peng jin is the structural quality of a flexible elastic sphere.
- The sphere expands from the centre outwards in all directions, like a rubber ball filled with air.
- Expanding, stretching and lengthening does not mean straightening or locking the joints or limbs.
- If the body is too tight you cannot establish peng jin.
- Find balance between a collapsed and floppy structure and an over-expanded and over-lengthened structure.
- When peng jin is present, any pressure or force coming into the body will be absorbed, grounded or redirected.
- Slightly inflate all of the joints without over stretching.
- Find an embracing balloon quality in the arms and the legs.
- Find a gentle pressure and avoid moving into tension.
- Be aware of sensations as you stand and let feelings come and go.
- As you tire, relax more into the structure to aid deeper release.
- Breathe slower and deeper to help move through body fatigue.
- Moving the joints gently can also help longevity.
- Soften all the joints.
- Relax your breathing.
- Close with 3 heavenly breaths.
Lesson 10 - Principle Fang Song - 20 Minutes
- Stand like a tree posture.
- Align the feet.
- Align the knees.
- Align the hips.
- Align the lower back, waist and abdomen.
- Align the spine.
- Align the shoulders and chest.
- Align the arms and hands.
- Align the head.
- Apply principle peng jin.
- Fang song roughly translates to applied relaxation.
- It means to use the least amount of muscular contraction to hold yourself in alignment.
- Release inappropriate muscle holding.
- Release any physical tension.
- Loosen the joints.
- Engage and lengthen the connective tissue, the fascia, ligaments, tendons and sinews to help maintain your structure.
- Fang song is lost if the muscles and connective tissue become over worked or taught, whether hyper contracted or over stretched.
- Find balance between tight tension and floppy collapsed.
- If some muscles are working over dominantly, try to release.
- Equalize the muscles to work together quietly.
- Work towards appropriate muscle contraction to hold your body up.
- Bring the same dynamic relaxation to the mind.
- Release any mental tension, any holding on or over thinking.
- Be aware of sensations as you stand and let feelings come and go.
- As you tire, relax more into the structure to aid deeper release.
- Breathe slower and deeper to help move through body fatigue.
- Moving the joints gently can also help longevity.
- Soften all the joints.
- Relax your breathing.
- Close with 3 heavenly breaths.
Lesson 11 - Principle Rooting - 22 Minutes
- Stand like a tree posture.
- Align the feet.
- Align the knees.
- Align the hips.
- Align the lower back, waist and abdomen.
- Align the spine.
- Align the shoulders and chest.
- Align the arms and hands.
- Align the head.
- Apply principle peng jin.
- Apply principle fang song.
- Your root can be described as the foundations of a building or the roots of a tree.
- Rooting is what allows the body to have structural integrity.
- Rooting creates a heavy quality within the lower body.
- The feet sink into the earth, like tree roots growing deeply into the ground.
- It is also the action of sinking your body weight down.
- Sink down into a kua or hip squat, lowering your centre of gravity and sinking your weight down.
- The feet and legs may feel heavy, with more weight in the lower body than the upper.
- Relax the abdomen and waist into the lower body.
- Loosen and relax the joints.
- Maintain an upright body and stability in your structure.
- Find an expansive spiralling lengthening quality without locking the joints.
- Return to finding the feet in stillness, from our very first lesson.
- Bring your mind’s eye down to the feet.
- Feel the feet connecting to the ground.
- Feel the pressure transferring through the feet to the ground.
- Balance that pressure, too little will uproot you, and too much will cause tension.
- In rooting the lower body has 60% of the weight, and the upper body has 40% of the weight.
- This can be described as yin yang.
- Yin is the lower body, taking on the quality of water, being fluid, weighted and drawing down.
- Yang is the upper body, taking on the quality of fire, being light, uplifting and expansive.
- Uprooting comes from raising the hips up to take the pressure off the legs.
- This moves your centre of gravity upwards moving the joints towards straight or locked.
- This disconnects the elastic quality in the connective tissue.
- This destabilises your structure.
- It is also possible to over root, which creates too much heaviness in the lower body.
- The quality of this is like becoming stuck down in a posture, without flexibility and the ability to rebound.
- This is the opposite end range of motion and has the same effect as uprooting.
- This happens when students try to mimic the posture of their teacher and over do it, as their body is not capable of that posture.
- A fine balance must be sought between uprooted and over rooted.
- Be aware of sensations as you stand and let feelings come and go.
- As you tire, relax more into the structure to aid deeper release.
- Breathe slower and deeper to help move through body fatigue.
- Moving the joints gently can also help longevity.
- Soften all the joints.
- Relax your breathing.
- Close with 3 heavenly breaths.
Lesson 12 - Principle Breath Work - 24 Minutes
- Stand like a tree posture.
- Align the feet.
- Align the knees.
- Align the hips.
- Align the lower back, waist and abdomen.
- Align the spine.
- Align the shoulders and chest.
- Align the arms and hands.
- Align the head.
- Apply principle peng jin.
- Apply principle fang song.
- Apply principle rooting.
- Close the mouth and teeth gently.
- Place the tongue on top of the palate behind the top front teeth.
- This helps close the airway to breath deeper.
- Start to breathe deeper and slower.
- Bring the breath down to the abdomen.
- As you inhale, the abdomen naturally expands out as the organs are pushed down by the diaphragm.
- On the exhale the abdomen relaxes to neutral.
- Continue with a gentle focus on the breath.
- For a full diaphragmatic breath, involve the side ribs and the lower back.
- As you inhale the abdomen, the side ribs and lower back naturally expand outwards from the centre.
- On the exhale relax to neutral.
- Continue with a gentle focus on the breath.
- Let it become more natural and familiar.
- Naturally lengthen the breath, avoid forcing the breath, find your own pace.
- Either foster circular breathing without gaps or pauses.
- Or foster breathing with a pause at the end, where you find a relaxed moment of complete stillness at the end of the exhale.
- Continue with a gentle focus on the breath.
- To advance the breath, co-ordinate the diaphragm movement with the pelvic floor, like two plates moving up and down.
- Inhale and expand the abdomen and relax the pelvic floor.
- Exhale and relax the abdomen and lift up the pelvic floor.
- This is the perineum, the Hui Yin point or the pelvic floor, they are all the same concept.
- Continue with a gentle focus on the breath.
- Breathing aids the release of physical tension and the release of mental tension, as the mind and body are connected.
- Breathe to calm the mind.
- Breathe to release the body.
- Listen to the space that is created by release.
- Take care breathing does not affect the quality of the alignment of the chest, lower back, pelvis and abdomen.
- Readjust your structure if you need to return to stability.
- Be aware of sensations as you stand and let feelings come and go.
- As you tire, relax more into the structure to aid deeper release.
- Focus on the breath to help move through body fatigue.
- Exhale with intention to release anything we are holding onto with our minds.
- Moving the joints gently can also help longevity.
- Soften all of the joints.
- Relax into the breath.
- Close with 3 heavenly breaths.
* Zhan Zhuang Video Course - Please note that the Taoist practices are not a replacement for conventional medical treatment. Please speak with your doctor prior to starting a new exercise programme. This information must not be taken as medical advice, it is for entertainment purposes only. *
